Face Morphing: CS180 Project 3
CS180: Intro to Computer Vision and Computational Photography
Srinidhi Raghavendran
Overview
In this project, we explore face morphing by defining correspondences between facial features, computing the midway face, creating a morph sequence, and extrapolating from a population mean to create a caricature.
Part 1: Defining Correspondences
The first step in the face morphing process is defining key points that correspond between the two faces. Basically, I had to manually select matching points on my face and Damaris's face (like eyes, nose, mouth, etc.) to ensure a smooth morph. Think of it like connecting the dots to make sure the features line up properly. I used the tool provided in the project specs to do this and then generated a Delaunay triangulation based on those points, which helps with the warping later. Check out the triangulations below!
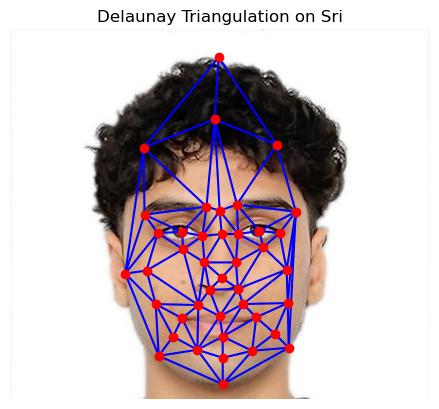
Sri Triangulation
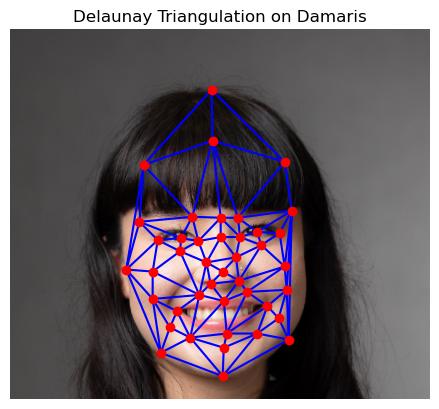
Damaris Triangulation
Part 2: Computing the Mid-way Face
Once the correspondences are set, the next step is to compute the "mid-way" face. This is like creating a perfect blend of the two faces, halfway between both in terms of shape and appearance. To do this, I averaged the key points (the correspondences) between my face and Damaris's face, warped each face to this average shape, and then blended the colors together. The result is a face that looks like a smooth combination of both! Below are the individual faces and the mid-way face in between.
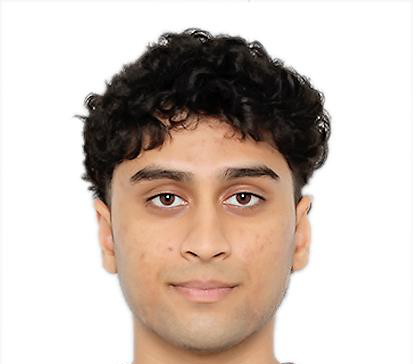
Sri's Face
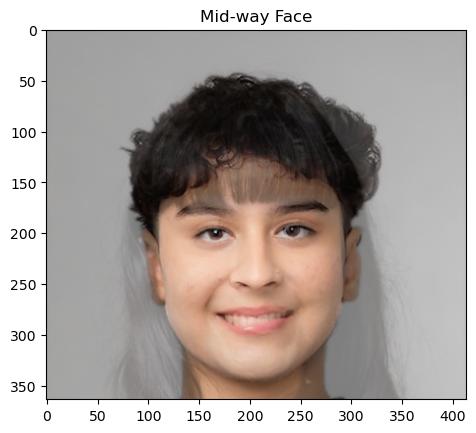
Mid-way Face
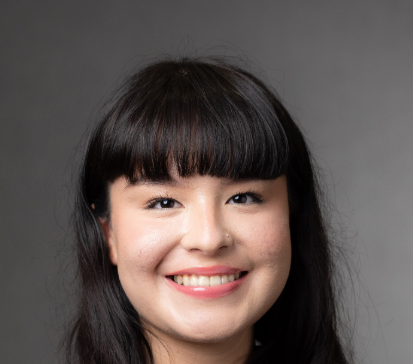
Damaris's Face
Part 3: The Morph Sequence
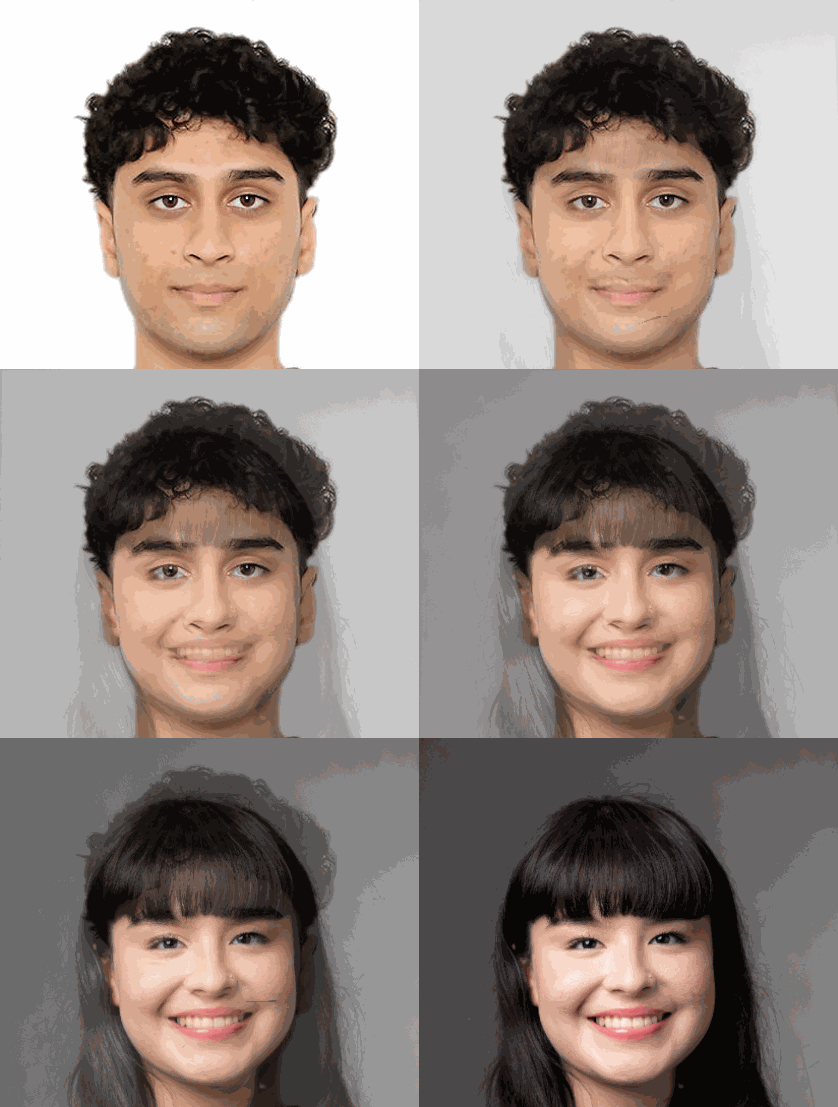
Now comes the fun part, creating the morph! Using the correspondences from Part 1, I generated 45 frames that gradually morph my face into Damaris's. Each frame is a blend of the two faces, controlled by two parameters: one for the shape and one for the colors. The first frame is all me, and the last frame is fully Damaris. In between, you get a smooth transformation that takes us from one to the other. Check out the GIF below for the full sequence!
Part 4: The Mean Face
For this part, I had to work with a dataset of annotated faces to compute the mean face shape of the population. The tricky part was resizing my image to ensure it had the same dimensions as the mean face. I needed to make sure that my face and the mean face were aligned, so I resized my Sri image to match the dimensions and positioned it so that my facial features lined up with the mean face shape.
To make sure everything matched up correctly, I overlaid the mean face triangulations onto both my resized Sri image and the mean face. This allowed me to check if the features were well-aligned and "passed the eye test" before I started the actual warping process. You can see the triangulations on both the mean face and my resized Sri image below.
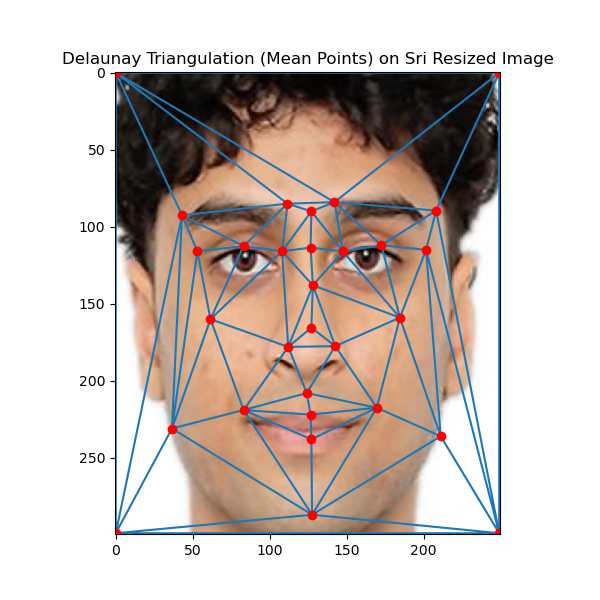
Delaunay Triangulation on Resized Sri
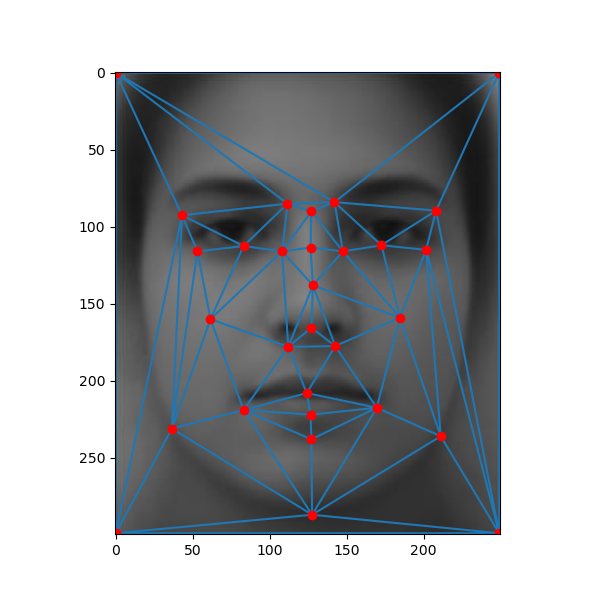
Delaunay Triangulation on Average Face
Once the alignment looked good, I went ahead and warped the images. Below, you can see how the mean face looks warped into my face's geometry and vice versa.
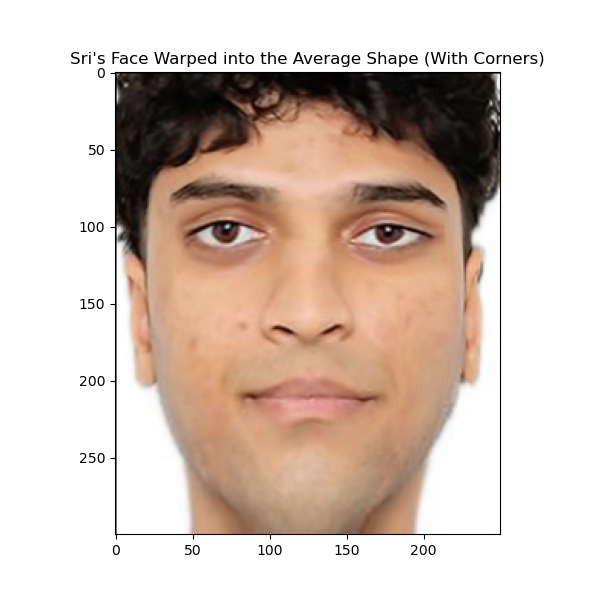
Sri Warped into Average Shape
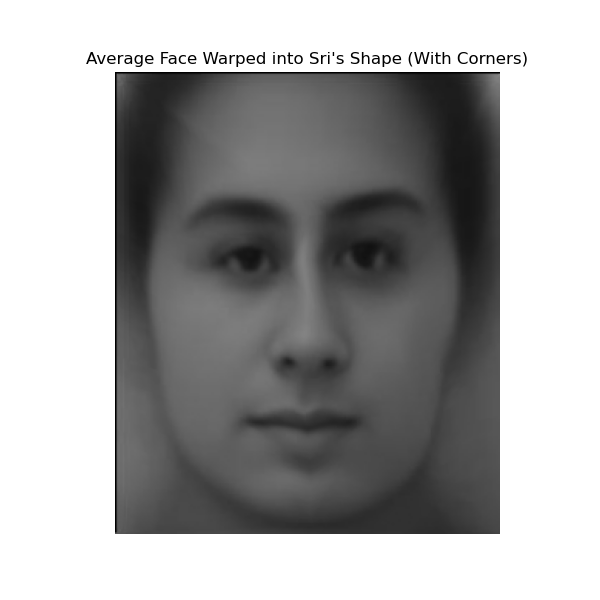
Average Face Warped into Sri's Shape
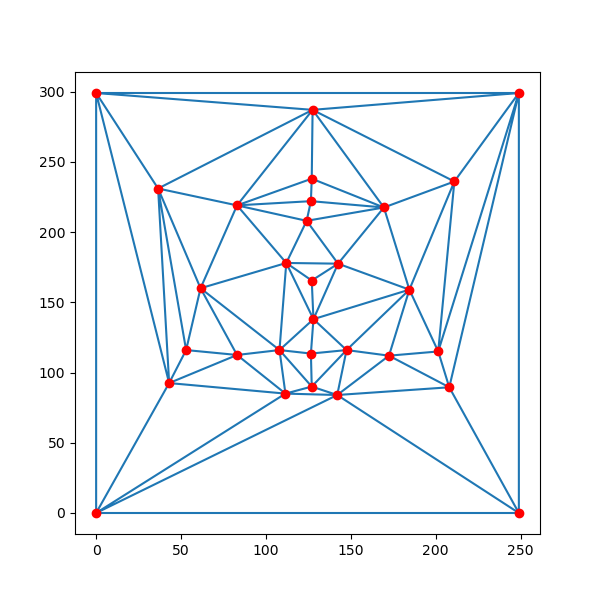
Delaunay Triangulation of Mean Shape Points
Part 5: Caricatures
In this part of the project, I created caricatures of my face by exaggerating the difference between my face and the average face. The idea is to "extrapolate" from the mean face, which essentially stretches or shrinks the unique features of my face based on how different they are from the average face.
To do this, I used a parameter called "alpha" to control the level of exaggeration. A positive alpha (2 or 3) makes the differences between my face and the average face more extreme, while a negative alpha (-1 or -2) minimizes those differences, making my face look more like the average.
First, I extracted the key points from both my face and the average face and added corner points to ensure the whole image was covered. Then, I computed a new "caricature shape" by using the formula: caricature_shape = average_shape + alpha * (my_shape - average_shape). After that, I warped my face into this caricature shape. Below, you can see the caricatures I generated with different alpha values.
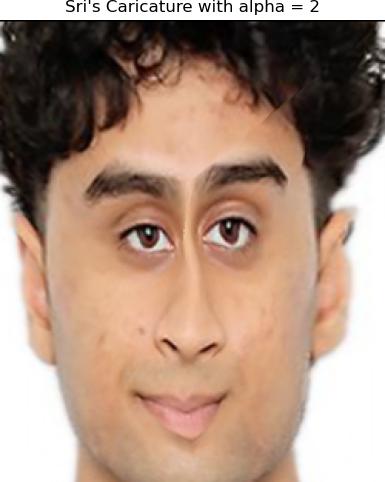
Caricature with Alpha = 2
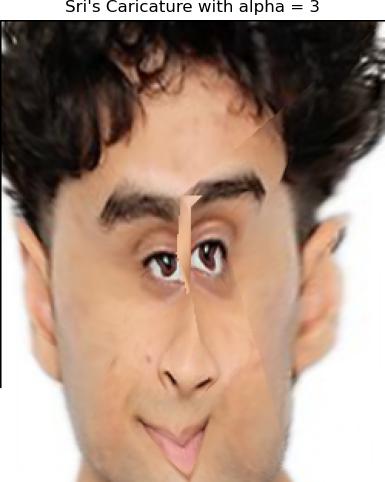
Caricature with Alpha = 3
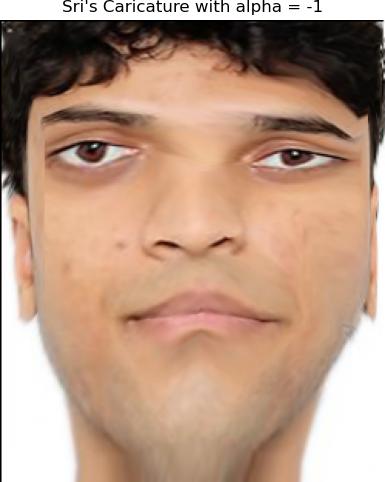
Caricature with Alpha = -1
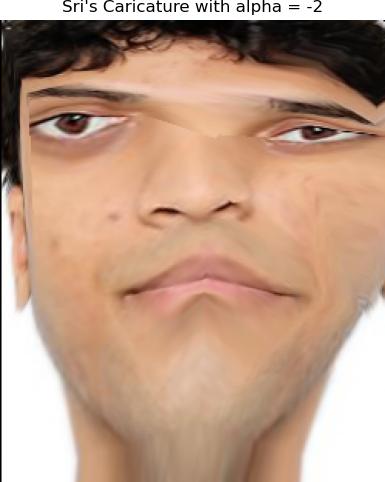
Caricature with Alpha = -2
As you can see, the caricatures with positive alpha values (like 2 and 3) exaggerate the features that make my face different from the average face, whereas the negative alpha values (like -1 and -2) make my face look more like the average. This was a fun way to explore how much my facial features deviate from the population mean!
Bells and Whistles
For a fun twist, I decided to morph my face into an average smiling face. First, I created an "average smiling face" using a dataset of smiling faces. I manually labeled corresponding points on my face and the average smiling face so that the transformation would be as smooth as possible.
Following the project spec, I performed three types of morphs: just the shape, just the appearance, and a blend of both. The results show how my face would look with the smiling shape, with the smiling texture, and with both shape and texture combined.
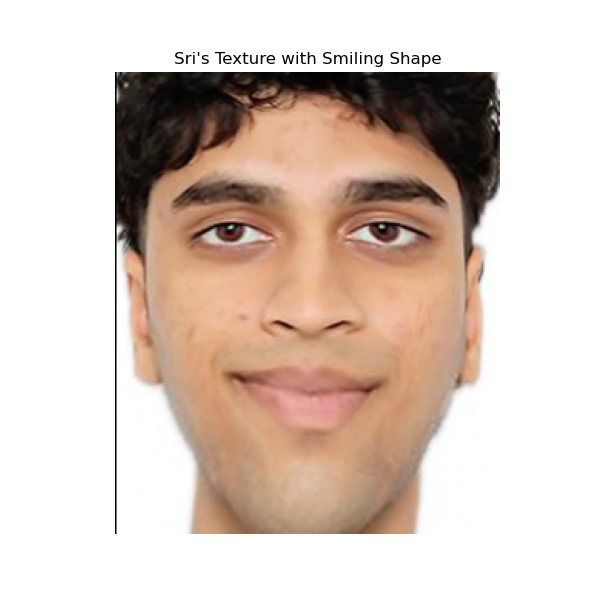
Smiling Shape Only
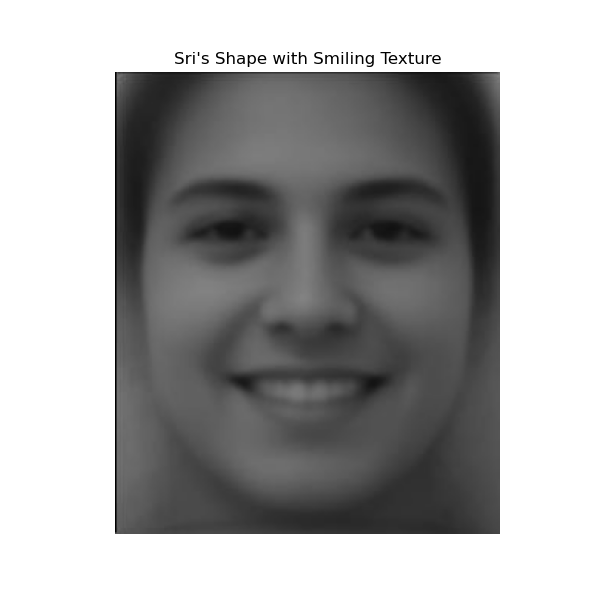
Smiling Texture Only
Lastly, I combined both the smiling shape and texture to create a hybrid morph. This shows what my face would look like with both the structure and appearance of a smiling face.
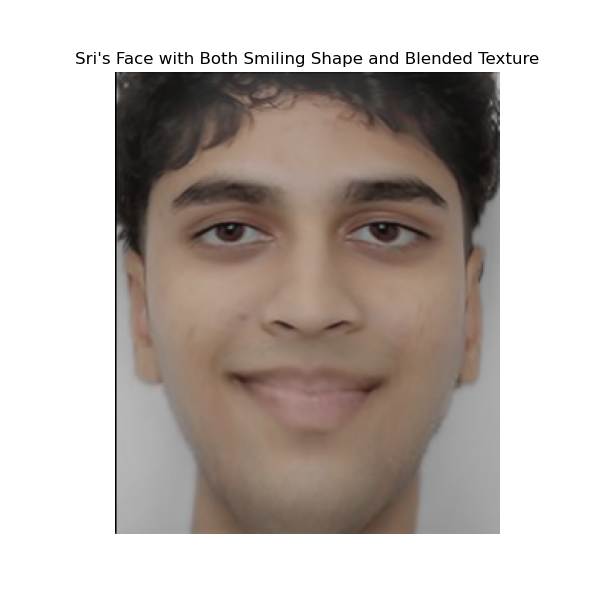
Blended Shape and Texture
Conclusion
This project was a rewarding experience that allowed me to dive deep into the fascinating world of face morphing. I enjoyed experimenting with the different aspects of morphing and exploring the effects of transformations on facial features. However, I did find the process of manually annotating points quite tedious at times. Despite that, the hands-on nature of the project really helped me understand the intricacies of computer vision and image warping. Overall, it was a valuable learning experience, and I’m pleased with the results!